August 15, 2017

Paw Print Clothespin Magnet DIY

Of the many household tools, one that is starting to go obsolete is the clothespin.  Not as many people hang wet clothes outside to dry on a clothesline anymore.  So what can you do with that basket full of clothespins just sitting in the laundry room?  Clothespins are finding new life with other purposes like a chip-clip or to hold papers on the fridge.


In this blog post, I will be providing you with instructions to DIY your own clothespin magnets. I was inspired to make these by one of my favorite Etsy shops: Sugar and Paint. The style I am making today is pet inspired; paw prints!  I am looking forward to featuring these at my Snowywinds Booth on August 26 at Dog’s Day in the Park.

Supplies:

Clothespins
Acrylic paint
Acrylic varnish
Paintbrushes and paint-sponge
Paint pallet
Wax paper
Round magnets
Hot glue gun


Step 1:
Make sure the clothespins are clean. Separate the spring from the two wood pieces. Make sure to keep the springs lined up with their wooden pieces. Early on I forgot to do this; when I went to put the clothespins back together they didn’t all line up correctly! :(


Step 2:
Paint the solid color. I use wax paper to prevent newsprint from sticking or transferring to the clothespin. *Depending on the age of the clothespins, you may want to apply a multi purpose sealer prior to painting the solid color.


Step 3:
Paint your design on the wooden piece you have chosen to be the front. To make a paw print, paint an upside-down heart, round off the top point, and add four toes. *Remember, dogs & cats have 4 toes!
          

Step 4:
Coat each wood piece with a clear varnish. Let sit overnight. This is important.  You do not want the varnish to be tacky when putting the clothespin pieces back together. If so, the mouth of the clothespin will stick shut.

Step 5:
Get the hot glue gun warming up. Assemble the clothespins making sure to use the correct spring for each wooden set. Using the hot glue gun, attach the magnet to the back of the clothespin about level with the spring. Remove any glue strings.  And voila! You have your clothespin magnet!


*All photos taken by myself

August 1, 2017

My Hippie Style


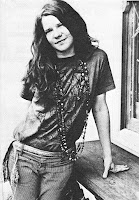
Flash back to my middle school years, a period of tying to discover and establish my self-identity. I found myself gravitating to the music of the late sixties, early seventies; the Doors, Led Zeppelin, Janis Joplin. On the TV show The Wonder Years, Kevin’s older sister was my favorite character. I loved the fashion styles of that period, so I started wearing tie-die and my Mom’s old “vintage” clothing. When low cut, bell-bottom jeans came back in style in the early 1990s, I had to have them. I would wear flowers in my hair and round “John Lennon” sunglasses. Peace signs were everywhere, including my Cold War poster hanging in my room. This was my style.
 
In high school, I began painting things in my newfound hippie style. My wooden desk chair was painted with multihued peace signs, paisley, and organic swirls. Then I started on my jeans: roses, the happy face, and more peace signs. I also painted some T-shirts for friends and myself. When the jeans wore out, I cut the painted part off and pinned them up on my cork-board. I didn’t know what I was going to do with these remnants, but I knew I wasn’t finished with them!


In the early 2000s I got my own sewing machine. I was very excited to try it out and start sewing. As my creative mind began to spin, the idea of making a purse from recycled fabric came to me. I had a pair of super comfy khaki pants that wore out beyond wear-ability. I cut the material into two panels. Then machine embroidered one of my jean pieces (rainbow peace sign) onto the top panel. I picked up some really cool fabric ribbon at Joann Fabric that reminded me of my Uncle’s camera strap. The ribbon is primarily black with bold colors; red, yellow, & green. While I have needed to make new bags for myself, the strap has been reused for the third time and has lasted 15 years.

Bag #2
I received (and still receive) a lot of compliments on my bag. Women asked if I made bags with other designs, like dragonflies, painted on them. This got me thinking… I started with a dragonfly bag. This bag was not only hand painted, but also had hand embroidery. I would sit outside in the evening and embroider. From there I moved on to my painted daisy bag, machine embroidery, and other repurposed fabrics like olive cargo pants and fabric samples. As I create and sew, it is my goal to encapsulate that 60s-70s hippie look in my bags.

 
www.etsy.com/listing/114780400
www.etsy.com/listing/240854402
www.etsy.com/listing/24075